
I came across a series of pictures that aside from having well painted figures as their subject, were impressive as photographs. I reached out to ask about how the photos were taken, and as a reply received a fully formed article. I’ve decided to post the article, written and prepared by Benjamin Wendt, below.
If you enjoy the article or the miniatures, more of Ben’s content can be found at tumblr, instagram, and twitter.
Setup
Simply put, the most important thing for miniature photography is lighting. You can get a ton of mileage out of a basic cell phone camera with good lighting. And good lighting boils down entirely to two light sources, at daylight color range (5000-6000 K). No need for a light box or anything fancy.
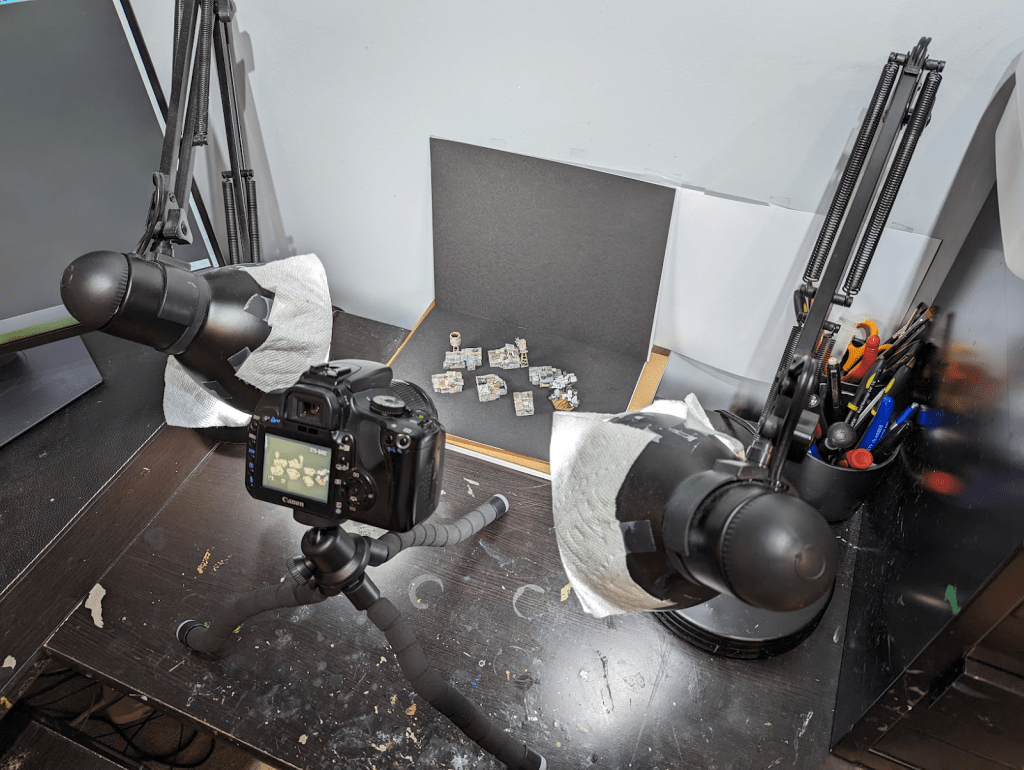
My setup is two adjustable table lamps. These are the same lamps that I paint with (if that wasn’t obvious from my nicked and paint-stained desk). For backgrounds, I use matte cardstock, black or white. Typically I use black because it makes the colors pop more. Colored cardstock is useful for dioramas or scenes.
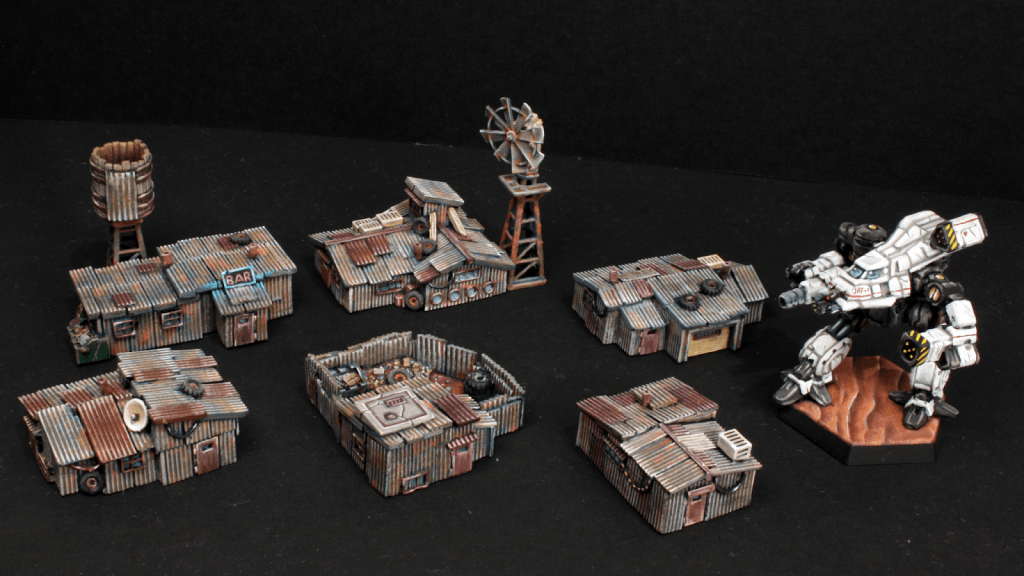
This is the picture of The Lazy Forger’s 6mm Shanty Town was taken using the above setup, with my digital camera. I made small adjustments to the color and contrast in Adobe Photoshop.
Cell Phone Cameras
Pretty much every cell phone has a passable camera these days. More expensive phones typically have better cameras, but that does not necessarily mean better pictures of miniatures. For example, my old Pixel 4 took better photos of minis than my current Pixel 6.
The first step to cell phone miniature photography is proper software. Default camera apps use a lot of algorithms on the photos they take which make your minis look harsh or grainy. I use a free software called Open Camera. If your default camera app has a “Pro” mode, it may work as well.

These 10mm peasants from Forest Dragon were taken with my Google Pixel 6.
To get good pictures, set the ISO on your camera app as low as it will go. Adjust the aperture to get the desired brightness. With these settings, the camera will be very sensitive to movement. Use a tripod or brace your phone against the desk or on the top of a book.

Open Camera on my Google Pixel 6, taking a shot of Ankylo Miniatures’ 10mm Deathwheel. Notice the ISO is far down as it will go.
Focus will be the biggest challenge for a cell phone camera. Cell phone cameras have notoriously poor depth of field and poor focus at the edges. You’ll find a mini’s face to be in focus but its extremities will be blurry. You can improve focus by backing up, at the expense of detail. Beware, cell phones use digital zoom, which use algorithms to enlarge an image. You will not capture extra detail by zooming in with your cell phone.
Digital Cameras
Digital cameras offer better depth of field and more precise control, but have a steeper learning curve. This makes them better than cell phones for taking pictures of whole units or dioramas.
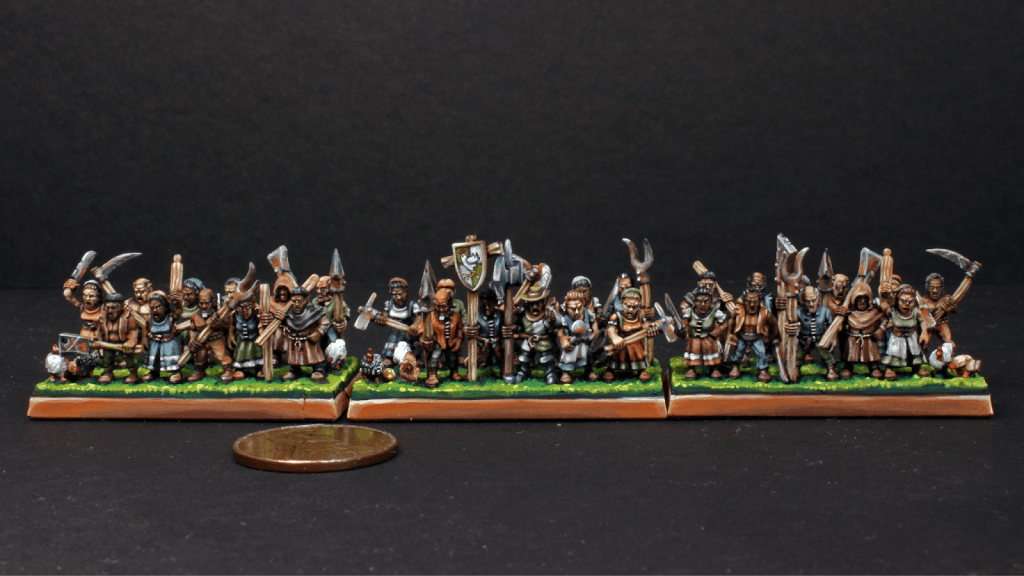
This unit of 10mm peasants from Forest Dragon was taken with my Canon Rebel digital camera. (The chickens you see on the bases come from Perfect Six Miniatures)
You don’t need an expensive digital camera. I use an ancient 10 Mega Pixel Canon Rebel, and it takes print-worthy photographs. KEH.com is great for getting used camera equipment at good prices. Check the bargain graded cameras if you want a great deal. Bargain grade equipment has lots of wear, but still takes great images.
Here’s the camera I purchased. At the time of purchase, I got a camera and lens for $125 shipped.
You’ll need a little tripod. You’ll also probably need a memory card and adapter if you get an older camera.
Photography with a digital camera takes research and practice. It will take time to get the hang of it, but the payoff is worth the investment.
Warhammer Community has a good article on what settings to use for miniature photography:
Digital Touch Up
It’s almost impossible to take an absolutely perfect picture. The result will invariably be just a little too light or dark, or the colors too warm or cool, or the contrast is just not quite where you want it. A good setup will get you 90% of the way there, but the last step is fixing our photography shortcomings in software like Adobe Photoshop or GIMP.
The thing to keep in mind is that digital touch ups will make a good picture look great, but it won’t help a bad picture.
If you have Photoshop, try running the Auto Tone, Auto Color, Auto Contrast commands. These will punch the contrast up and sometimes bring colors more in line with real life. GIMP and other free tools have similar commands. Other tools can brighten things in shadows, alter colors and sharpen things that are slightly out of focus. Remember that subtlety is key. Digital changes beyond small nudges will usually make your minis look worse, not better. If you find yourself moving a lot of sliders or running lots of filters, you need to go back and get a better photograph.
Dioramas
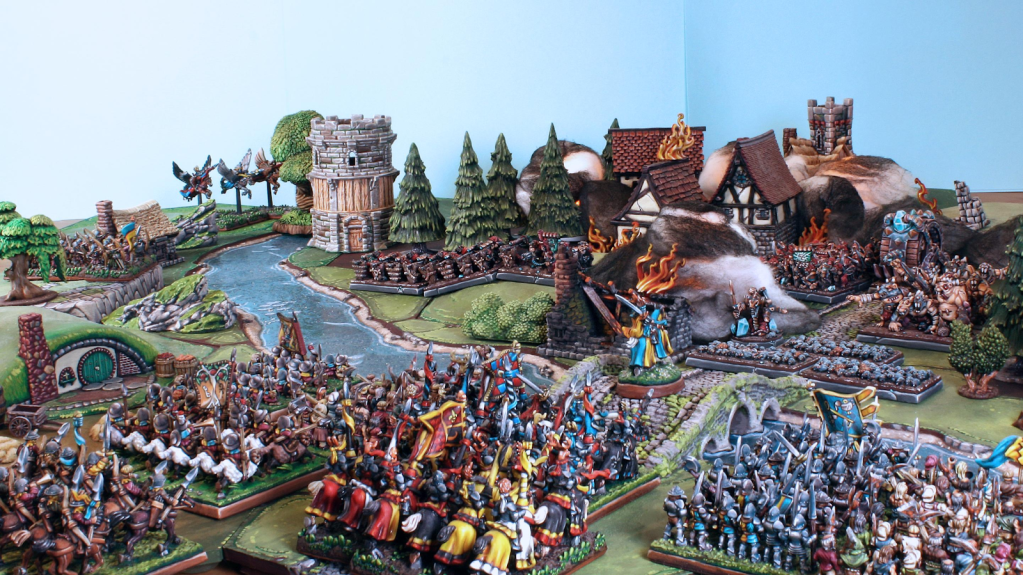
This 10mm Warmaster diorama is made from focus stacking several photographs from my digital camera, and features miniatures from a variety of sources. Forest Dragon’s chivalric knights rush to battle Akylo’s evil rat men. The halfling sheep riders are from Warp Miniatures.
Dioramas are challenging because you need to capture a very large depth of field. No camera will take a large diorama in just one photograph; something will always be out of focus.
To get everything in focus, you’ll need to use a technique called focus stacking. Focus stacking uses a computer program such as Adobe Photoshop to blend multiple pictures together, taking only the in-focus parts of each photograph. Each picture is taken without moving the camera, only the focus is adjusted. A tripod is required because the camera absolutely must not move! Most dioramas need 3 pictures with different focus points. Start by getting a picture with foreground objects in focus, then midground, then background. You can add more pictures with different areas of focus if the depth gets very deep.
I use Adobe Photoshop for focus stacking, but there is free software out there. For Photoshop, you need to bring all the pictures in as layers. Select all the layers. Then use the Auto-Align Layers feature in the edit menu. Once its done, use the Auto-Blend Layers feature. Viola! Good luck out there!

Looks great!
LikeLike